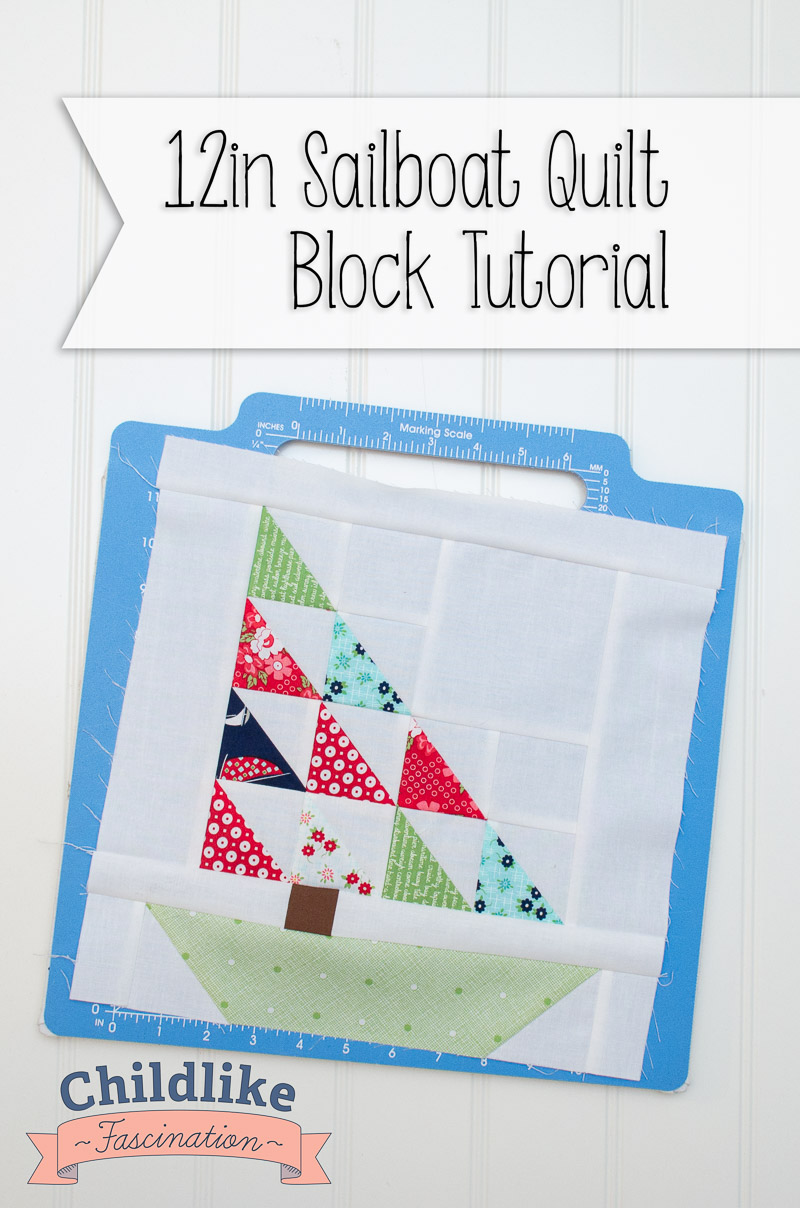
I’m back with part 2 of the 12″ finished (12 1/2″ unfinished) sailboat quilt block tutorial. This fun nautical themed block is perfect for the cottage commissioned quilt I’ve been planning and working on. Next week I have a fun post planned to explore different layouts for this quilt block in a couple nautical themed quilt projects! You can see part one of this tutorial – how to make the sail in last week’s post.
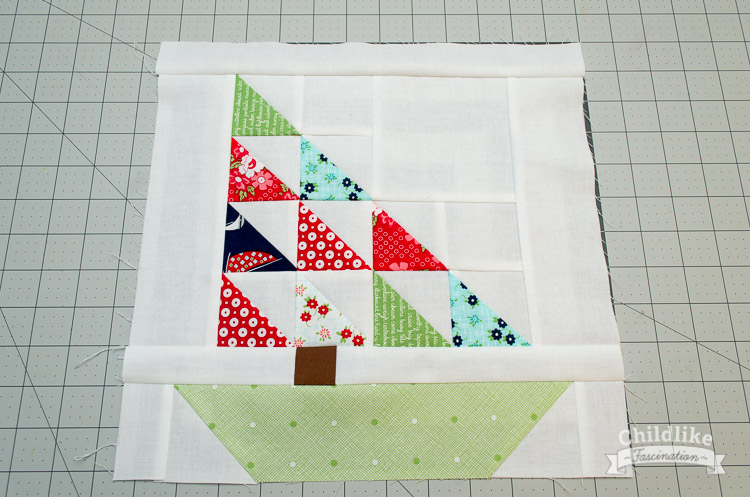
Hull Instructions
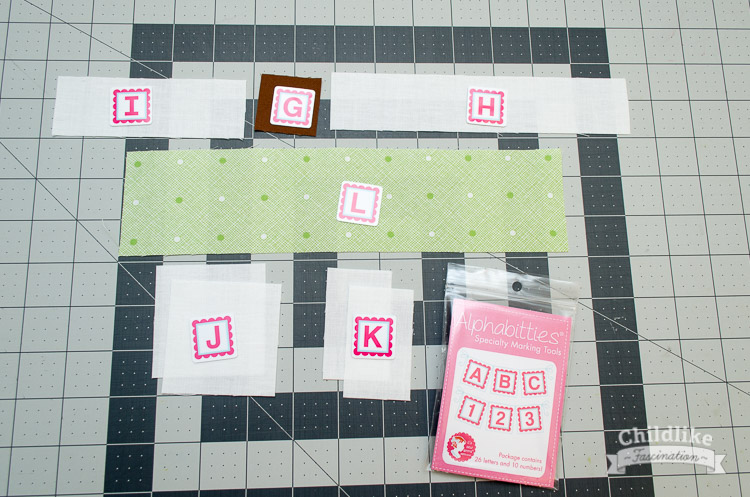
Materials:
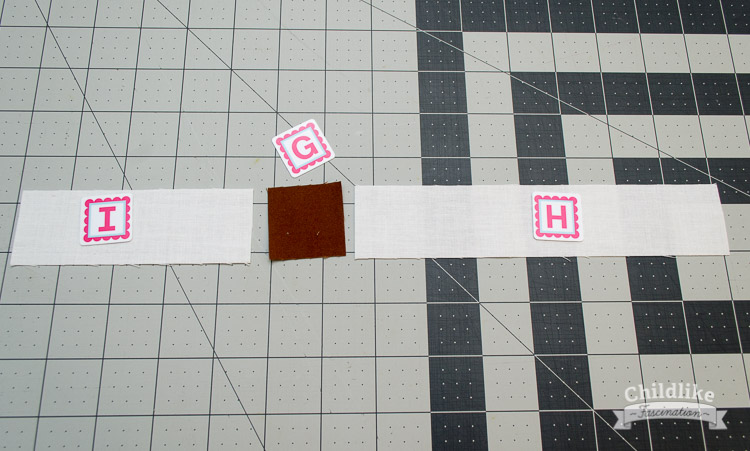
- G (1) 1 1/2″ squares mast fabric
- H (1) 1 1/2″ x 7 1/2″ background fabric
- I (1) 1 1/2″ x 4 1/2″ background fabric
- J (2) 2 1/2″ squares background fabric
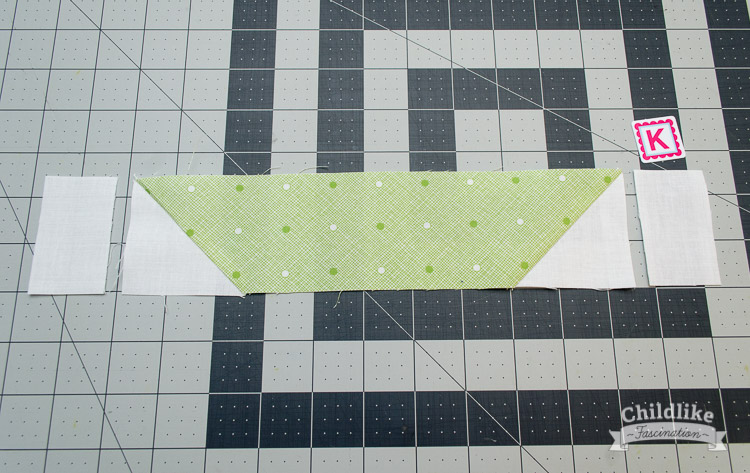
- K (2) 2 1/2″ x 1 1/2″ background fabric
- L (1) 2 1/2″ x 10 1/2″ hull fabric
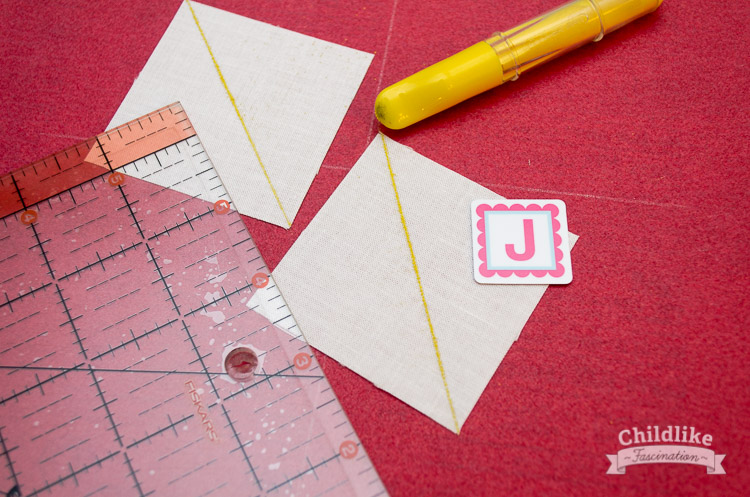
1. Draw a diagonal line (with erasable) on the wrong side of both the (2) 2 1/2″ (J) background squares
2. Align the (2) 2 1/2″ x 2 1/2″ (J) background squares to the 2 1/2″ x 10 1/2″ (L) hull fabric as shown below (direction is important!)
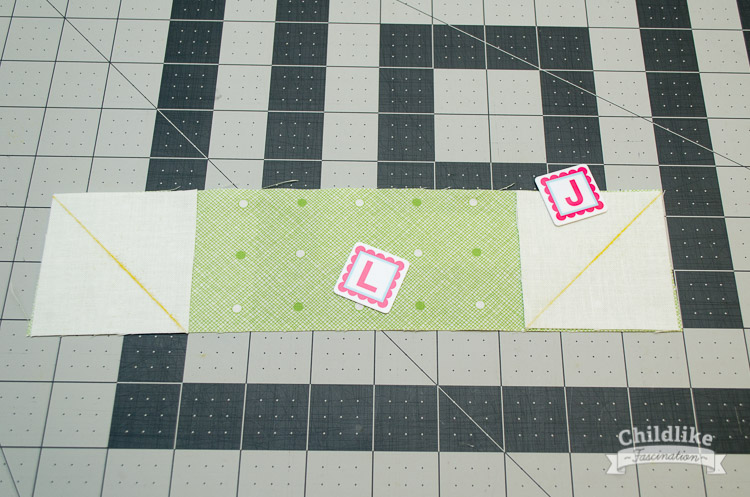
3. Sew on the marked line then trim off corner 1/4″ away from the seam
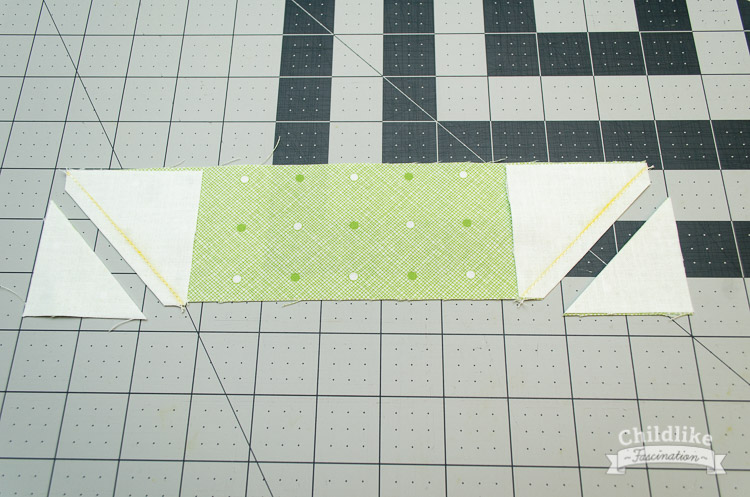
4. Sew the (2) 1 1/2″ x 2 1/2″ (K) background strips to opposite sides of the hull unit
5. Sew the 1 1/2″ x 7 1/2″ (I) and 1 1/2″ x 4 1/2″ (H) background strips to opposite sides of the 1 1/2″ (G) square mast piece
6. Join the mast strip to the hull to the sail
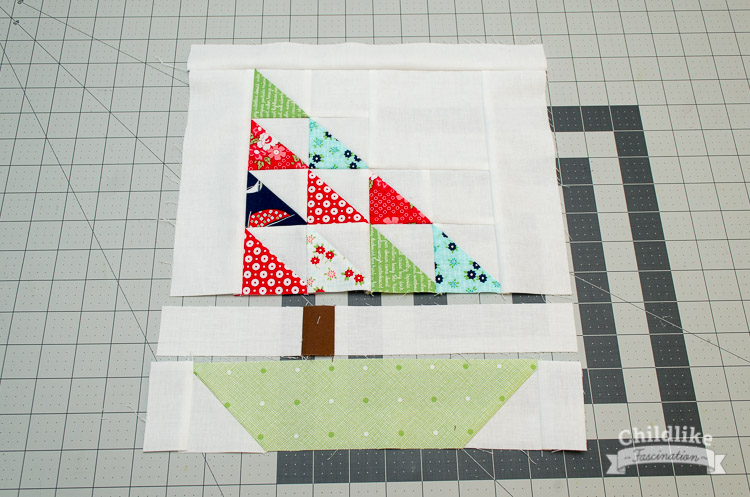
6. Bask in the sunshine on you brand new 12″ Sailboat Quilt Block!
Isn’t is lovely?!?!
For my sailboat wall hanging I needed 12 of these 12″ finished sailboat blocks. Next week I’ll be talking about layouts you could use with this design to inspire your nautical sailboat project! Hope you enjoyed this two part tutorial!
What a cute block and I always love Bonnie and Camille’s fabrics. The little letter papers are such a great idea for labeling the pieces in the pictures!
Stitch and flip is a great technique and something I have been using a lot more of in my work lately. The sailboats are so cute, and I really look forward to seeing how you put them together.
I’ve been elbow deep in the quilting – since it’s a gift for mom (who reads the blog) I can’t post any more pics till it’s done and revealed and it’s killing me cause I’m so used to posting in progress shots! Oh well, more the reason to finish quickly!
This block makes me happy. I could see making itin blue and white with a touch of red for that nautical all-American feel. A tote bag, maybe (you know I love a good tote bag). The tutorial is a good example of how to give directions. I’m taking notes.
Glad you liked the tutorial – I followed my favorite steps of writing out the whole post first, making the block from the instructions in my post and taking photos along the way. I managed to find a couple typos in doing it this way too! I love this line of fabric for a nautical quilt. It’s just enough nautical/Americana without being too in your face with it! Can’t wait to finish and share it with everyone!
What a darling block Terri Ann! A great way to use up scraps too! Thank you for the tutorials!