
The other week I posted about the sailboat wall hanging I had been designing for my family’s cottage. After visiting a few design idea I ended up creating a fun 12″ finished (12 1/2″ unfinished) quilt blocks. Here’s part one on how to make this quilt block for yourself! I’ll be posting in the coming week with part 2 and some layout ideas! Part one of this free sailboat quilt block tutorial is to make the sail using half square triangles!
Pattern Yield: 12″ finished Sailboat Quilt Block
Sail Instructions
Materials:
- A (6) 3 1/2″ squares background fabric *
- B (6) 3 1/2″ squares sail fabric (2 ea. of 3 colors)*
- C (2) 2 1/2″ squares background fabric
- D (1) 4 1/2″ square background fabric
- E (2) 2 1/2″ x 8 1/2″ background fabric
- F (1) 1 1/2″ x 12 1/2″ background fabric
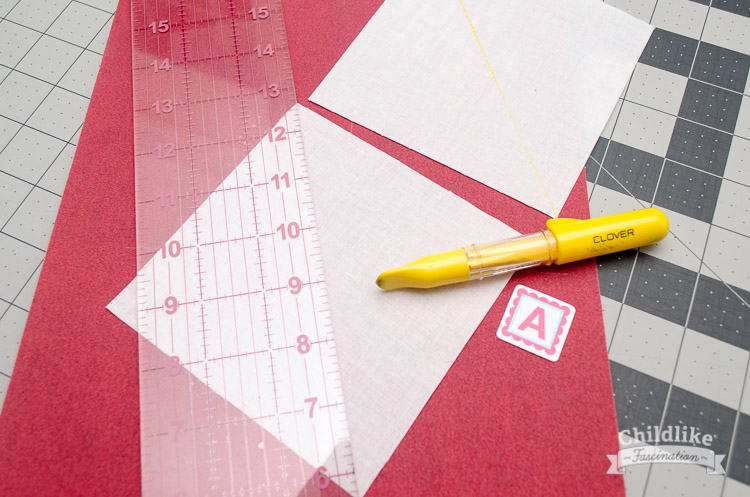
* You’ll see in the pictures, I used 5″ charms for pieces A and B. At that size there was more waste fabric when trimming the half square triangles than I like to have so the pattern is written for a more accurate size.

1. Draw a line diagonally across the wrong side of the (6) 3 1/2″ (A) background fabric squares
2. Pair up the 3 1/2″ (A) background squares with the 3 1/2″ (B) sail squares, right sides together
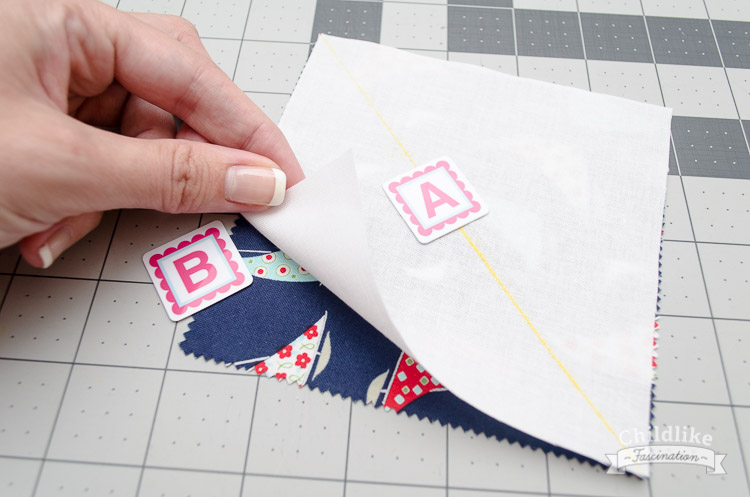
3. Sew a 1/4″ to both sides of the drawn line

4. Cut the fabric along the drawn line

5. Press seam allowances towards the dark fabric to yield 8 half square triangles (HST)

6. Trim all HST down to 2 1/2″ square

7. Arrange HST, the 2 1/2″ (C) bacgkround squares and the 4 1/2″ (D) background square as shown below

8. Sew the HST and 2 1/2″ (C) squares as shown below

9. Sew resulting squares together as a four patch

10. Sew the 2 1/2″ x 8 1/2″ (E) background fabric to the sides of the sail square

11. Sew the 1 1/2″ x 12 1/2″ (F) background fabric to the top of the sail
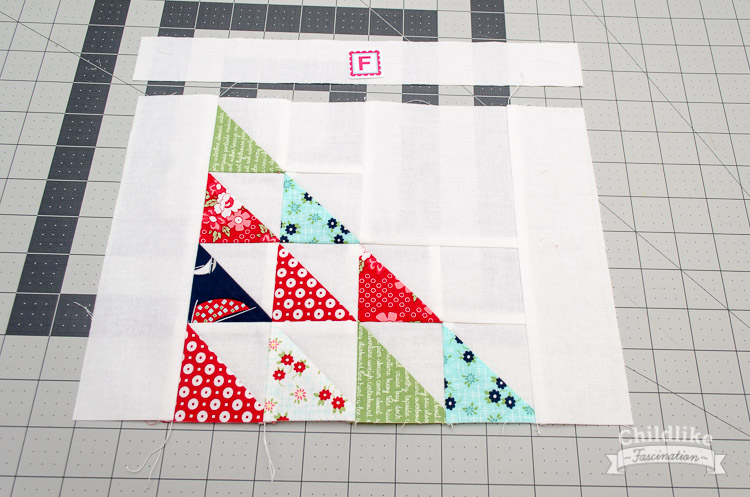
Sail, complete!

The hull post will be up soon can be found here: Sailboat Quilt Block Tutorial (Part 2: The Mast & Hull and the some ideas on layouts for this 12″ finished quilt block with some nautical themed ideas!
I used the it’s Sew Emma Alphabitties to mark the pieces for an easier tutorial. Please let me know in the comments if you think this was helpful and if I should continue using them for tutorials! I purchased them a couple months ago and this is the first time I’ve used them and I thought they were helpful.
Linking up with:


I definitely think the letters were helpful! This is a cute block; thanks for sharing the pattern with us. 🙂
Yay I’m glad the letters helped make it more clear, I felt like it would but I’ve been staring at these pieces and pattern for weeks now so I wasn’t sure if it was just me 🙂
I love this – I have some summer beach house home dec fabric that would work for a cushion backing so I’m thinking of this for the front of a summer cushion!
This would make a lovely cushion Ruth! I actually have some leftover half square triangles and had considered making *just* one more for a cushion but decided I really needed to focus on the task at hand instead!
I love Alphabities!! I use them all the time!
I liked the letters – are they sticky backed? When you first showed your rendering of your family cottage quilt I loved it. Can’t wait to see the finished block.
Glad you’re as excited about the sailboats as I am Diana! The Alphabitties aren’t sticky backed, they’re smooth so they tend to slide about if you’re moving things but I’m planning on adapting my set to work better for my “shifting around” style 🙂
What a perfect block for a beach house…or anywhere! I can see this as a pillow, quilt, mini ~ the list goes on and on! Thanks for sharing your tutorial Terri Ann!
So cute! Looks like there’s a lot of wind! And made up with sailboat fabric, too. I also give a big thumbs up to the letters–I may steal that idea!
I have pinned this so I know where to find it when I want to make it!! Thanks.
Great block. Thanks for sharing.
Very nice! Looks perfect for the cottage.
I love the alphabitties, and I think this is such a clearly written tutorial. I recognize some daysail fabrics in your block which are perfect. I have some daysail scraps, so I think I need to try out this tutorial some time soon.